
* 퇴근후딴짓 님의 강의를 참고하였습니다. *
[ 문제 ]
심장마비 확률이 높은 사람
ㅇ 파일 : train.csv, test.csv
ㅇ 타겟 : output(1:심장마비 확률 높음, 0:심장마비 확률 낮음)
ㅇ 평가 : ROC_AUC, 정확도(Accuracy), F1
ㅇ 데이터 : 성별, 나이, 혈압, 콜레스테롤, 공복혈당, 최대심박수 등의 컬럼이 있음
[ 풀이 ]
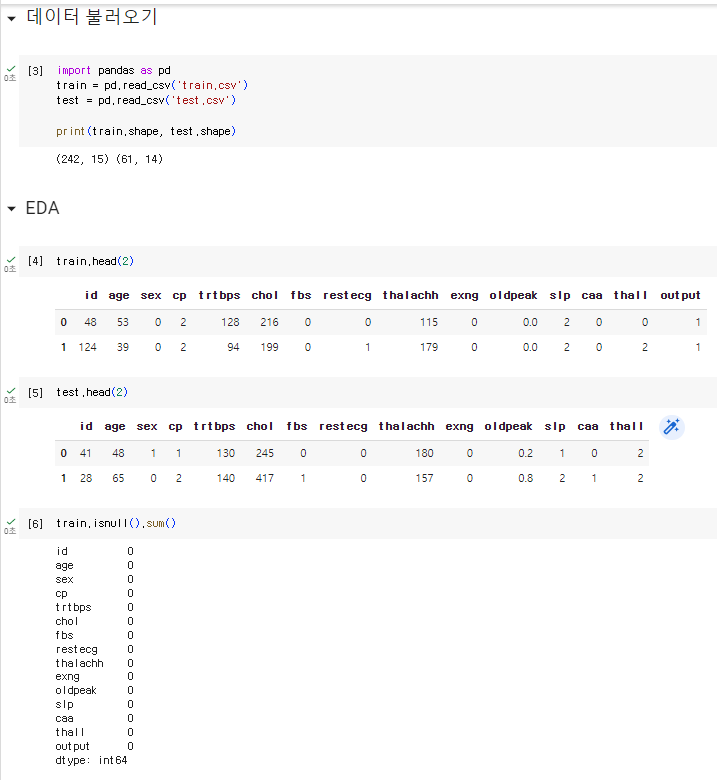
1. 라이브러리 데이터 불러오기
2. EDA
import pandas as pd
train = pd.read_csv('train.csv')
test = pd.read_csv('test.csv')

print(train.shape, test.shape)
train.head(2)
test.head(2)
train.isnull().sum()
test.isnull().sum()
train['output'].value_counts()
train.describe()
train.info()
train.nunique() #고유값 확인
3. 데이터전처리 & 피처엔지니어링
train = train.drop('id',axis=1)
test_id = test.pop('id')

test.head()4. 모델&평가 (검증데이터분리)
ㅇ 검증데이터분리
from sklearn.model_selection import train_test_split
X_tr, X_val, y_tr, y_val = train_test_split(train.drop('output',axis=1), train['output'], test_size=0.15, random_state=2022

)
ㅇ 모델(하이퍼파라미터 튜닝), 평가
- 랜덤포레스트
# 랜덤포레스트

from sklearn.ensemble import RandomForestClassifier
from sklearn.metrics import roc_auc_score, f1_score, accuracy_score

rf = RandomForestClassifier(random_state=2022, max_depth=5, n_estimators=400)
# 하이퍼파라미터 튜닝 : max_depth(3~12), n_estimator 100이 기본인데 tree 개수 늘리는 거고 많을 수록 속도는 느림(200, 400, 800, 1000)

rf.fit(X_tr, y_tr)
pred = rf.predict(X_val)
pred_proba = rf.predict_proba(X_val)

print(roc_auc_score(y_val, pred_proba[:,1]))
print(f1_score(y_val, pred))
print(accuracy_score(y_val, pred))

# 0.9301242236024845
# 0.7906976744186046
# 0.7567567567567568

# max_depth=3
# 0.9378881987577639
# 0.8636363636363636
# 0.8378378378378378

# max_depth=5
# 0.9409937888198757
# 0.8444444444444444
# 0.8108108108108109

# max_depth=7
# 0.9347826086956521
# 0.8444444444444444
# 0.8108108108108109

# max_depth=5, n_estimators=200
# 0.9440993788819876
# 0.8444444444444444
# 0.8108108108108109

# max_depth=5, n_estimators=400
# 0.9409937888198757
# 0.8444444444444444
# 0.8108108108108109
- Xgb
# xgb
from xgboost import XGBClassifier

xgb = XGBClassifier(random_state=2022, max_depth=5, n_estimators=400, learning_rate=0.02)
# 하이퍼파라미터 튜닝 : max_depth 기본이 3, n_estimator 기본이 100, learning_rate 기본이 0.1인데 n_estimtor 올릴 때 learning_rate는 내려야함

# max_depth : 3, 4, 5,.... 12
# n_estimators : 100 ~ 1000 / learning_rate : 0.1 .... 0.01


xgb.fit(X_tr, y_tr)
pred = xgb.predict(X_val)
pred_proba = xgb.predict_proba(X_val)

print(roc_auc_score(y_val, pred_proba[:,1]))
print(f1_score(y_val, pred))
print(accuracy_score(y_val, pred))


# 0.9192546583850931
# 0.8444444444444444
# 0.8108108108108109

# max_depth=5
# 0.9099378881987578
# 0.8181818181818182
# 0.7837837837837838

# max_depth=5, n_estimators=400, learning_rate=0.02
# 0.9037267080745341
# 0.8181818181818182
# 0.7837837837837838
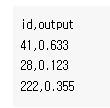
5. 예측 및 csv 제출
pred_proba = xgb.predict_proba(test)
pd.DataFrame({
    'id': test_id,
    'output':pred_proba[:,1]
}).to_csv('0000.csv', index=False)

pd.read_csv('0000.csv')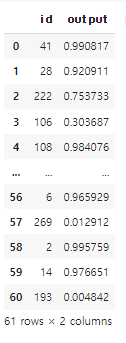
2023.06.12 - [자격증공부/빅데이터분석기사] - [빅데이터분석기사] 작업형1 판다스 문법 활용 요약
[빅데이터분석기사][작업형1] 판다스 문법 활용 요약
1. 라이브러리 및 데이터 읽어오기 ㅇ 컬럼명 확인할 수 있도록 세팅하기 import pandas as pd df = pd.read_csv('ㅇㅇㅇㅇ.csv') pd.set_option('display.max_columns', None) #컬럼명 전부 확인할 수 있도록 셋팅하기 2.
inform.workhyo.com
2023.06.12 - [자격증공부/빅데이터분석기사] - [빅데이터분석기사] 작업형2 머신러닝 이론 및 프로세스 요약
[빅데이터분석기사][작업형2] 머신러닝 이론 및 프로세스 요약
* 퇴근후딴짓 님의 강의를 참고하였습니다. * 1. 머신러닝 ㅇ기존에는 데이터/규칙을 Rule Base로 결과를 도출하였지만, 머신러닝은 데이터와 결과(해답)을 기반으로 학습을 통해 규칙을 도출하고
inform.workhyo.com
'자격증공부 > 빅데이터분석기사' 카테고리의 다른 글
| [빅데이터분석기사][유형2] 문제유형 풀어보기(다항분류) (0) | 2023.06.18 |
|---|---|
| [빅데이터분석기사][작업형1] 5회 기출문제 풀이(기초통계, 정렬) (0) | 2023.06.17 |
| [빅데이터분석기사] 작업형2 문제유형 (회귀) (0) | 2023.06.14 |
| [빅데이터분석기사] 작업형3 가설검정 이론 및 프로세스 (0) | 2023.06.12 |
| [빅데이터분석기사] 작업형1 판다스 문법 활용 요약 (0) | 2023.06.12 |


